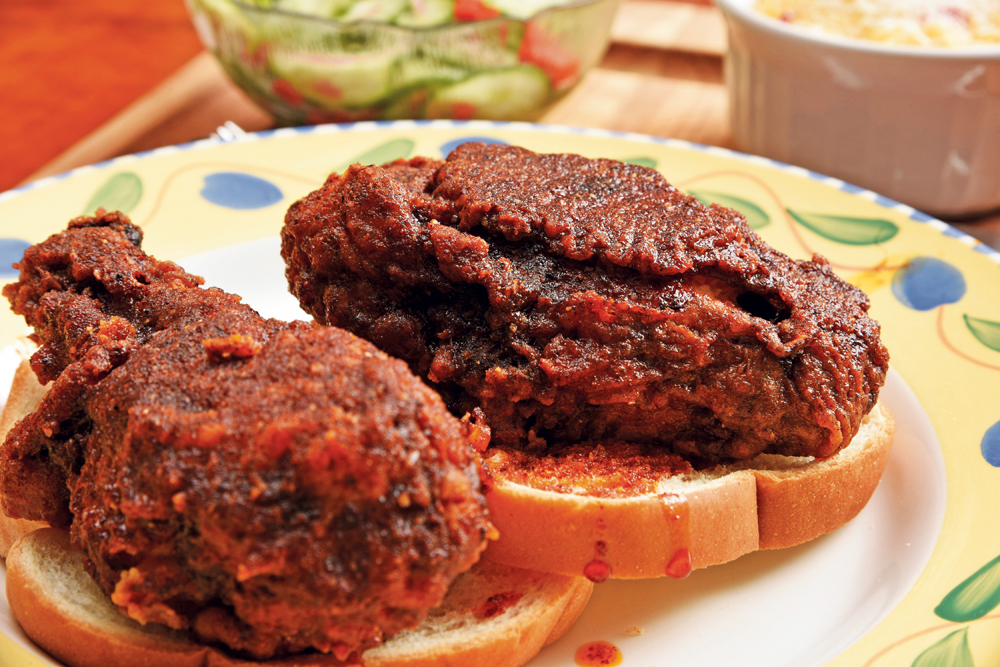
Suddenly, Nashville-style hot chicken is popping up all over in the form of new restaurants or as menu items at others such as KFC and O’Charley’s. In Louisville, Joella’s Hot Chicken and Royals Hot Chicken both opened in the last year, and those restaurants are regularly packed. Those in the know who have long had their favorite Nashville chicken spot — Prince’s (supposedly the first), Hattie B’s, Bolton’s or others — or newbies working their way up the heat ladder to the tantalizing (or terrifying) top, may have wondered if it is possible to make hot chicken themselves, at home. I’m here to tell you that it is possible, though a bit of a challenge, and it may take some experimenting to reach the right heat level.
Nashville hot chicken is nothing like hot wings, which are easily done by dousing chicken wings in a commercial hot sauce like Frank’s or Tabasco and popping them in the oven or under the broiler. Hot chicken is more elaborate.
In both theory and practice, hot chicken has three applications of spicy flavor — in the brine, in the coating, and in a basting of ground hot pepper-infused oil or paste of oil and ground peppers, both of which are applied after the bird is cooked. In order to get those steps just right, Louisville’s two local hot chicken gurus, Tony Palombino of Joella’s and Ryan Rogers of Royals, did quite a bit of research and experimenting to come up with their products. Although I will give a workable recipe at the end here, a home cook is likely to have to do similar testing and experimenting with spices and frying styles to achieve a desired result.
Both Rogers and Palombino point out that in Nashville, every hot chicken emporium does it differently, be it their breading, method of frying or the amount of heat added to the final product. Typically, this happens through the use of varying types of cayenne pepper; some are hotter than others. If you are going to try this at home, similar experiments with different ap-proaches are suggested.
Perhaps it might be useful to see how local chefs got hooked on this way of frying chicken.
How hot chicken came to Louisville
As he and a friend drove back from an intensive Memphis barbecue-indulgent weekend via Nashville, Rogers became convinced that opening a Nashville-style hot chicken restaurant in Louisville would be a good idea. This revelation came upon him as he broke out in an uncontrollable sweat, his eyes teared up and he felt so jittery that he had to turn the driving over to his buddy. Rogers was enjoying the endorphin rush from his sampling of the full range of “hot” in the hot chicken in Nashville, and he believed diners in Louisville would share his passion for hot chicken. His momentary suffering served as the inspiration for Royals Hot Chicken.
Tony Palombino took a more measured, businesslike approach to developing his newest venture, Joella’s Hot Chicken. When brainstorming new menu ideas for his Main Street honky-tonk bar and music venue, Manny & Merle, he thought about the foods of Nashville and began testing his hot chicken recipe on customers. Soon after, he noticed food orders overall doubled and that one-third of the increase was attributable to hot chicken orders.
An opportunity to turn Joella’s into a formal concept opened up when Palombino moved his long-standing BoomBozz Pizza & Taphouse on Frankfort Avenue to the former 60 West Bistro space on Lexington Road That relocation freed up the Frankfort Avenue space for conversion to a chicken joint.
Both Rogers and Palombino think that American tastes and tolerance for the hot and spicy had been developing since Buffalo wings and other spicy foods have become popular. To test their patrons’ tolerance for spicy heat, both Joella’s and Royals offer a range of heat levels, from classic Southern fried chicken that just uses salt and pepper in the coating, up through levels such as, at Joella’s, “Ella’s Fave” (“burst of flavor and lil’ heat”), Tweener, Hot (“spicy fire”) and “Fire in the Hole!” (“inferno”), and at Royals, mild, medium, hot, X-hot and Gonzo (a level labeled on the menu as “madness”).
Three steps to rich, hot flavor
To achieve this range of flavor and spice, Joella’s and Royals follow the classic hot chicken paradigm. First, the chicken is brined, to drive the flavor all the way to the bone, as Rogers puts it, and not just have it all on the coating. To get the crispy texture and crackling mouth feel, the right coating has to stand up to both frying and to the final application of the oil and spice mixture once the chicken exits the fryer.
Palombino uses a vinegar-based brine, which his chicken absorbs for up to 24 hours. Rogers experimented with various brining concepts, and settled on a fairly traditional salt/sugar/spice combination in water, which he chose not to detail. Traditionally, a buttermilk-based brine is used, and Rogers likes the way the acidity in buttermilk acts on the meat. But he warns that milk sugars (lactose) in buttermilk can caramelize too quickly in high-temperature frying and impart burnt flavors. For the lower temperature cast-iron pan frying in home kitchens, buttermilk brines are fine.
Rogers, who has a history degree from NYU, likes to understand the context of foods, to see how, where and when dishes developed as they did. In this case, the issue that interested him was the pepper available in Nashville kitchens to provide the heat, and that clearly was cayenne. While he begins with cayenne, an homage to the classic recipe, he does use a variety of different pepper mixes for a finishing oil and spice paste of varying heat intensity.
That said, there are some reasons to let experts make this dish. It takes time and planning, such as brining for many hours before cooking. Mixing the flour and spices and dipping and dipping again is messy, as is frying on the stovetop. The first times you try to work out a seasoning balance, you are sure to go too light on the heat, or too heavy, so stay patient. If you want to try, here is how I managed it pretty well.
––––––––––––––––––––––––––––––––––––––––––––––––––––
Nashville-style hot chicken at home
(Serves 4)
Note: Experienced home chicken cooks buy “fryers” — whole chickens of between 2½ and 3½ pounds — and break them down yielding eight pieces (a pair each of legs, wings, thighs and breasts). If butchering a whole chicken seems intimidating (it is really not hard at all and there are videos aplenty online to walk you through it), you can buy packages of thighs, legs and bone-in breasts, which are easier to manage for the novice.
1 whole fryer chicken (or 8 pieces)
Oil for frying (vegetable, canola or peanut)
Spongy white bread (Wonder Bread or equivalent)
For the brine:
2 cups buttermilk (or enough to cover chicken)
2 tablespoons salt
2 teaspoons white pepper
1-4 tablespoon(s) hot sauce of your choice
For the breading:
2 cups self-rising flour
2 teaspoons salt
1 teaspoon white pepper
2-4 tablespoons Cayenne pepper
For the finishing oil:
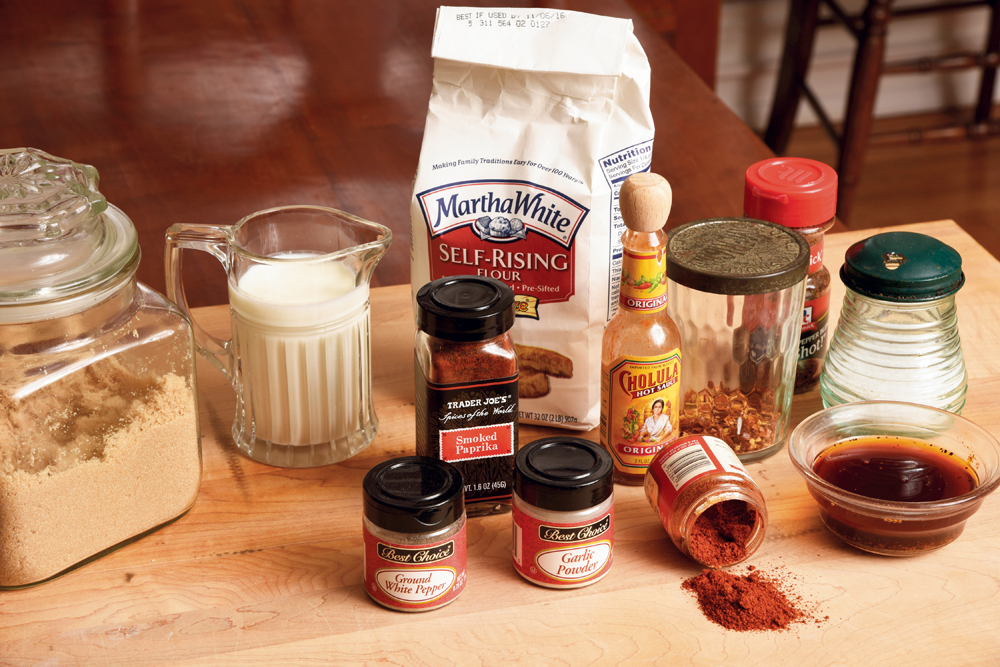
The mix of dried hot peppers is another part of the recipe that lends itself to personal preference. We chose a mixture of ground red chili peppers and dried chile de árbol, dried ancho chilies, dried pasilla peppers and dried Szechuan peppers. You can use some, all, or a mixture of your personal favorites.
2-4 tablespoons mix of dried hot peppers (see note above)
2 tablespoons cayenne pepper
1 teaspoon salt
1 teaspoon white pepper
1⁄2 teaspoon garlic powder
1⁄2 teaspoon paprika
1 tablespoon light brown
sugar, packed
1⁄2 cup spent cooking oil
used for frying
For the brine:
In a large shallow bowl, combine buttermilk, salt and white pepper. Add as much of your favorite hot sauce as you think is reasonable for a start. Begin with at least one tablespoon per two cups of brine and go up to as much as 4 tablespoons. Add the chicken and let it sit covered in the refrigerator for at least 4 hours up to 24 hours.
(Note: As you experiment with hot sauce and hot pepper amounts, here in the brine and later in the breading and finishing oil, keep clear notes about your quantities of hot spices, so you know how to proceed, up or down, for the future.)
For the breading:
Place flour in a large shallow bowl, and season with salt and white pepper and as much cayenne pepper as you think reasonable for your tastes. Some recipes I looked at suggested that the flour should be more reddish with cayenne pepper than white.
Remove the chicken from the brine, letting excess brine drip off. Coat chicken pieces in the seasoned flour, covering well, and shake off excess. Dip again into the brine, making sure all parts of the chicken get wet again. Let excess drip off, then coat again well in the seasoned flour. This double coating is essential for a crisp coat that will stand up to the final dousing and finishing oil at the end of cooking. Set aside.
For frying:
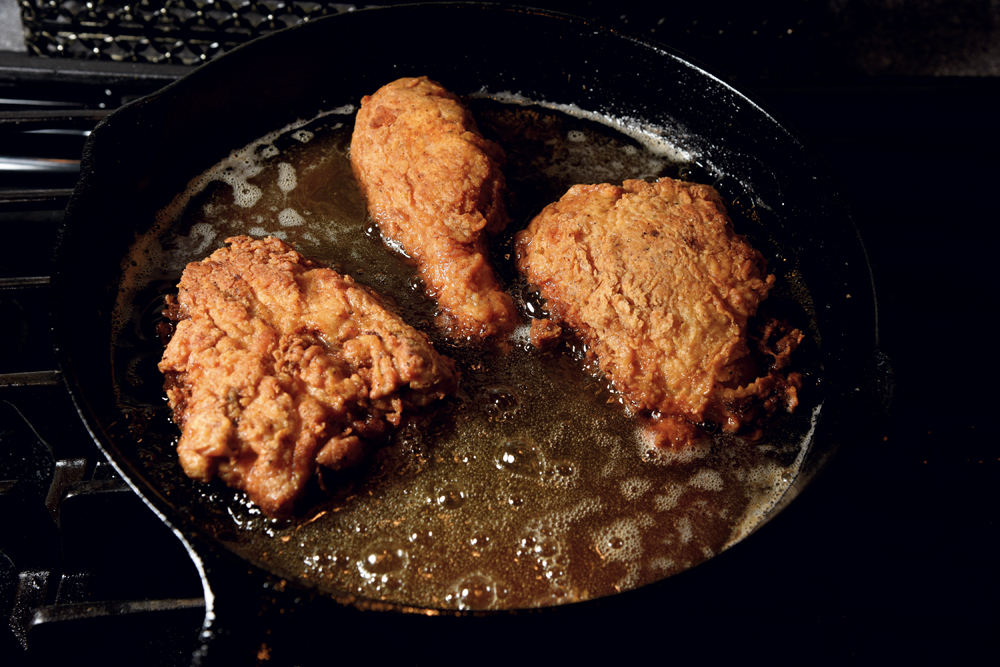
In a large cast-iron skillet, heat 1 to 2 inches of oil to 325 degrees. Add 3 or 4 pieces of breaded chicken — do not crowd the pan. Cover, adjusting the heat to keep the temperature at around 325 degrees, trying not to let it vary by more than 25 degrees either way. If it gets too hot, the coating will burn. If it drops too low, it will take longer to cook, and the chicken will absorb more oil. I had to adjust the temperature often while chicken cooked. (I found that using a thermometer for checking the oil temperature during frying, and another instant-read digital thermometer to check internal temperature of the chicken, was essential.)
Fry chicken about 12 minutes, until nicely browned on one side. Carefully turn the chicken over and cook for another 10 to 15 minutes, until internal temperature of chicken is 160 to 165 degrees. Remove and let drain on a wire rack in a low oven while you fry the rest of the chicken.
For the finishing oil:
Here is where the final heat level is controlled. The hotter this finishing oil, and the more you add, the hotter the chicken. So experiment, starting conservatively and adding more pepper, or different sorts of pepper, as you wish.
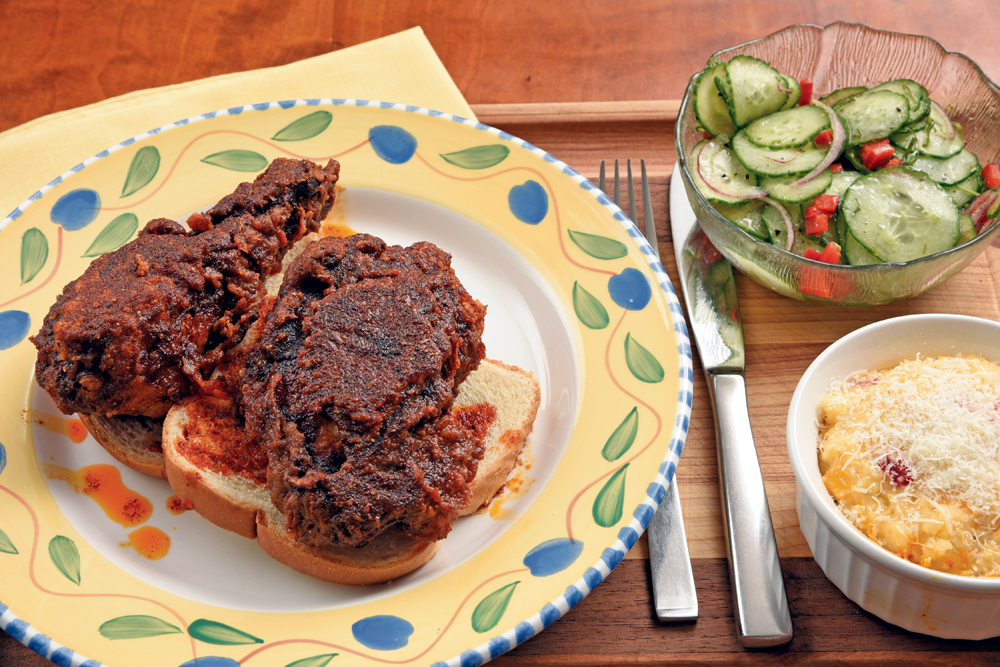
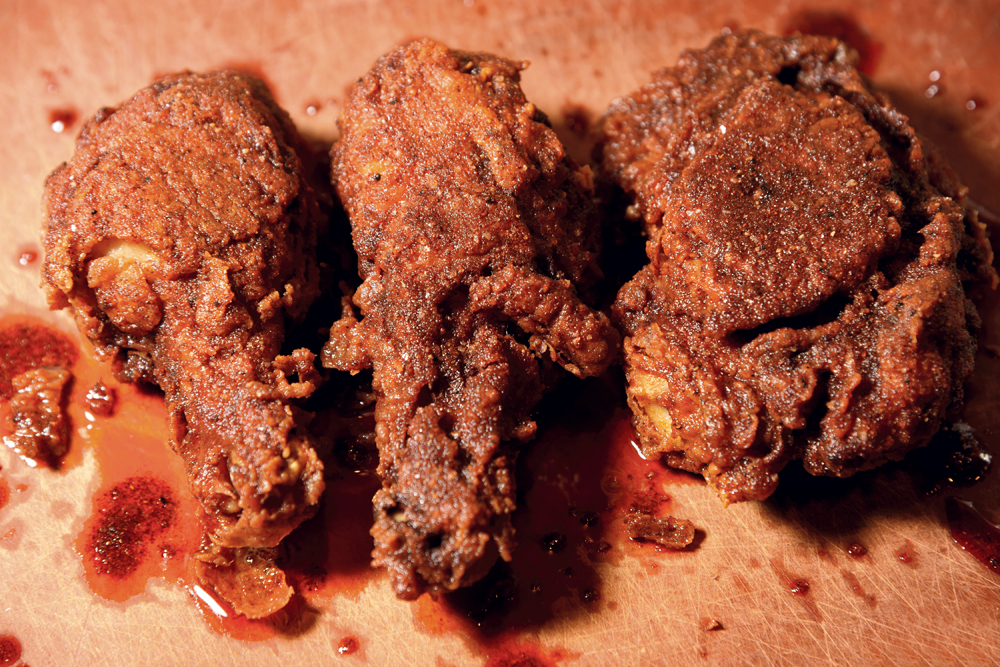
In a food processer, grind mix of dried chili peppers. In a heat-resistant bowl, combine ground chili peppers, salt, pepper, garlic powder, paprika and brown sugar. When chicken is finished frying, ladle 1⁄2 cup of the spent cooking oil used for frying into the bowl and combine. Brush this finishing oil on the cooked chicken, place chicken on top of white bread (to sop up the oils).
Side dishes can help control the spicy bite. A cooling cucumber salad, made with oil, can help absorb excess capsaicin, which is oil soluble. Likewise, cheesy grits, made with milk, can also moderate spicy pepper heat. Rogers suggested pimento cheese grits, a good idea because you can make enough pimento cheese to have for sandwiches or a party dip later.
––––––––––––––––––––––––––––––––––
Cucumber salad
(Serves 4)
1 large seedless English cucumber
1 small red onion
1⁄4 red bell pepper, seeded and diced
Salt and pepper
2 tablespoons white vinegar
6 tablespoons olive oil
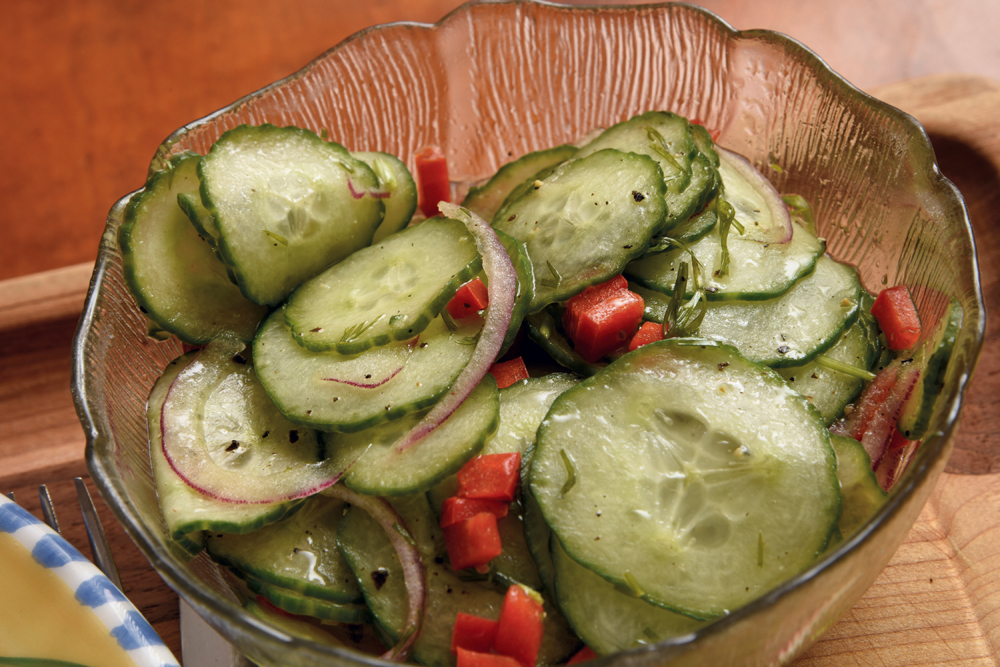
Trim ends off cucumber and peel (or not, if you choose. I usually peel off strips of skin, leaving stripes that look attractive when cuke is sliced.). Peel onion. Slice both cuke and onion into very thin rounds. (I often use a vegetable peeler to slice the cucumber, shaving off thin slices. Or, I use a mandolin set as thin as I can manage.) Slice a side off the red pepper, remove any seeds, and then dice that slice fairly small (reserve rest of pepper for other uses). Place cucumber, onion and red pepper in a bowl, season with salt and pepper to taste. Dress with oil and vinegar and toss to combine.
––––––––––––––––––––––––––––––––––
Pimento cheese grits
(Serves 6)
For the grits:
2 cups milk
1 teaspoon salt
1 cup stone-ground grits
Pimento cheese:
1 cup sharp Cheddar cheese, grated
1⁄2 cup small-curd cottage cheese
1⁄2 cup (or more, to taste) mayonnaise
1⁄2 cup of roasted red peppers,
diced, (or 4-ounce jar of diced
pimentos, diced)
1⁄4 cup juice from dill pickles
Pinch cayenne pepper
Grated Parmesan (for garnish)
It is probably best to make the pimento cheese first. In a bowl, fold together all ingredients. Add enough mayonnaise to make a thick sandwich spread.
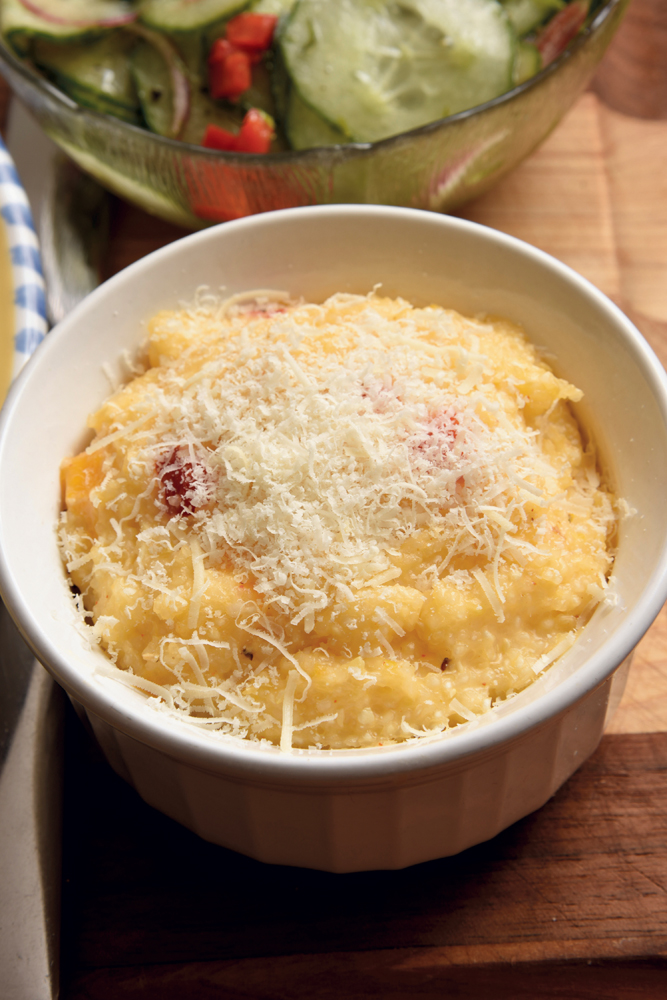
In a saucepan, bring the milk and salt to a boil, stir in grits slowly, and bring back to boil. Lower heat and simmer, stirring often, until grits thicken to your taste, 10 minutes or so. Remove from heat and fold in about 1/2 cup of the pimento cheese mixture, until cheese melts and is incorporated into the grits. Spoon grits into an ovenproof casserole dish or individual ramekins, sprinkle on Parmesan and heat in oven until cheese melts and browns a bit. F&D


